Building Surveying
Jul 16, 2026
Snagging report for new builds: UK buyer's guide
Discover how a snagging report new build can safeguard your investment. Learn to identify defects and hold developers accountable today!

A snagging report for a new build is a structured, itemised document that records every defect, incomplete finish, and substandard element in a newly constructed property before or immediately after handover. Most new builds contain between 100 and 150 defects on average, ranging from hairline plaster cracks to misaligned door frames and faulty electrical sockets. Getting these issues formally recorded is not optional if you want them fixed. Your snagging report is the legal and practical foundation for holding your developer accountable under the 2-year builder warranty, and the earlier you produce it, the more leverage you hold.
A snagging report, also referred to in the construction industry as a post-construction inspection report or new build defect report, is the formal mechanism buyers use to compel developers to remedy defects at no cost. The term “snagging” is widely used in the UK residential market, but the underlying document functions as a legal record of outstanding obligations the developer must fulfil under the National House Building Council (NHBC) Buildmark warranty or equivalent schemes such as Premier Guarantee or LABC Warranty.
The 2-year developer repair period covers defects in workmanship and materials, while the structural warranty extends to 10 years. Without a written, dated record of defects submitted promptly, disputes become your word against the developer’s. Common new home snagging issues include poorly fitted skirting boards, incomplete grouting, missing insulation, drainage problems, and condensation caused by inadequate ventilation. These are not trivial. A missed damp issue behind a kitchen unit can cause thousands of pounds of damage within 18 months.

Buyers who treat the snagging process casually, relying on verbal conversations with site managers, consistently report worse outcomes than those who produce a formal written report. The common problems found in building surveys confirm that defects missed at handover rarely fix themselves and frequently worsen.
The ideal time to conduct a snagging inspection is after the builder declares the property complete but before legal completion and handover. At this stage, commercial pressure on the developer is at its highest. The site team wants to close out the plot, receive final payment, and move on. That pressure works entirely in your favour.
Developers do not always grant pre-completion access, and some will refuse outright. If that happens, inspections within the first two weeks of ownership are the next best option, with findings emailed to the developer immediately. The key is speed. Early reporting within the first weeks of occupation maintains momentum and developer willingness to act under warranty.
There is a critical commercial reality here that most buyers miss. Developers resolve pre-handover issues faster as “completion issues” than they do post-move-in requests, which are treated as slower “after-sale service.” Once you have moved in and the developer has received full payment, you have shifted from a completion problem to a customer service queue.
Your snagging inspection checklist should cover:
Pro Tip: Carry out your inspection in daylight with a torch, a spirit level, and a phone camera. Artificial lighting hides surface defects that natural light reveals immediately.
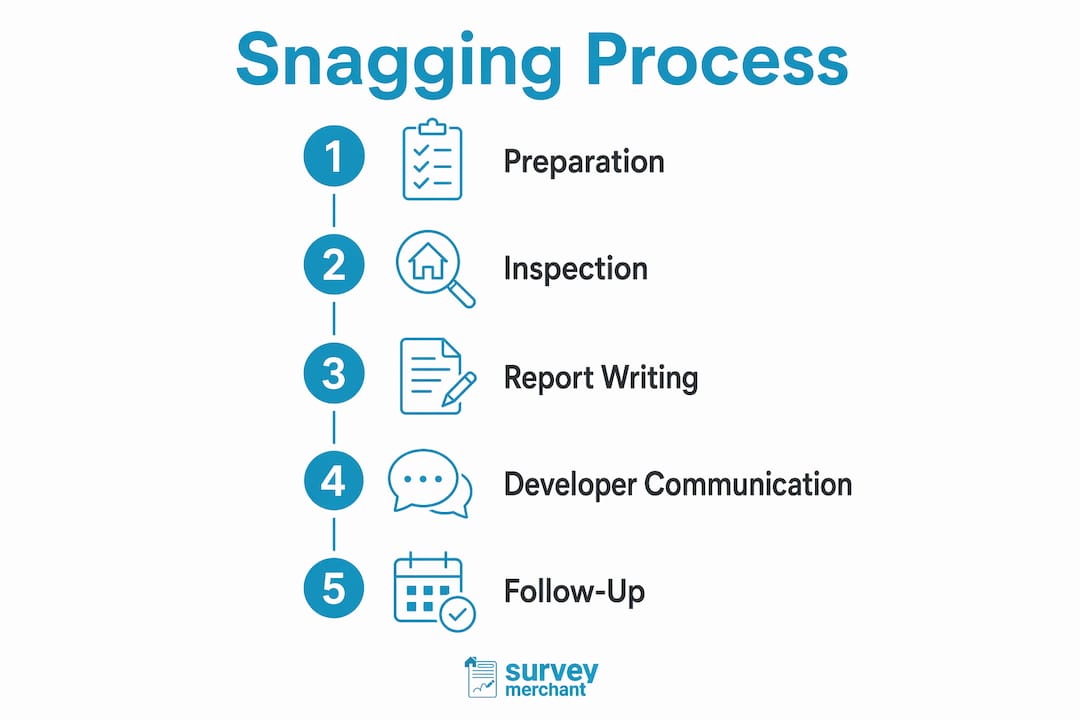
A professional snagging report is not a handwritten list of complaints. It is a structured document that a site manager, contracts manager, and individual tradespeople can all act on without ambiguity. A well-structured snag list with unique item numbers, precise locations, severity ratings, and photographs reduces disputes and accelerates repairs significantly.
Structure your report using the following numbered format for each defect:
Providing both close-up and wide context photos prevents developer denials about locating defects. A close-up shows the defect clearly; the wide shot proves exactly where in the room it sits. Developers who claim they “cannot find” a reported issue have no defence against a photo that shows the defect in relation to a door, window, or fixed fitting.
The table below shows the difference between a weak and a strong defect description:
| Weak description | Strong description |
|---|---|
| “Paint looks bad in hallway” | “Hallway ceiling, 0.5m from light fitting: visible brush marks and uneven coverage across 0.3m² area. Severity: Minor.” |
| “Door doesn’t close properly” | “Bedroom 2 door: latch fails to engage strike plate. Gap of 4mm on latch side when closed. Severity: Major.” |
| “Bathroom tiles not right” | “En suite shower enclosure, left wall: grout missing from three horizontal joints at mid-height. Severity: Major.” |
Prioritise defects affecting safety, moisture, structure, and workmanship over minor cosmetic annoyances. A focused snag list signals to the developer that you are serious and organised. A list of 200 items where 150 are cosmetic grievances dilutes the impact of the genuinely significant defects.
Pro Tip: Use construction reporting software such as BRCKS to log, photograph, and track defects digitally. A timestamped digital record is far harder to dispute than a PDF sent by email.
All correspondence with your developer must be in writing. Phone calls are not a record. A site manager’s verbal promise to “get someone in next week” is legally worthless unless you follow it up in writing. Verbal agreements should be followed by summary emails titled “Record of our conversation” to maintain a legal audit trail.
When you submit your snagging report, structure your communication to set clear expectations:
If the developer does not respond within your stated deadlines, your follow-up email should reference the 2-year builder warranty by name and cite the specific warranty scheme your property is registered under. This shifts the conversation from a favour to a contractual obligation. Developers who ignore warranty correspondence face formal complaints to the NHBC, the New Homes Ombudsman Service, or, in serious cases, legal proceedings.
Do not rely on the developer’s own customer care portal as your sole record. These systems are controlled by the developer. Always maintain your own independent email trail. For guidance on how builder responsibilities extend beyond snagging into structural matters, the builder responsibility in party wall agreements article provides useful context on formal obligations.
The single most effective piece of leverage you hold is financial. Withholding final payment or a retention of 2.5 to 5 per cent until the snag list is resolved is the most powerful tool available to buyers. Once final payment transfers, the developer’s motivation for non-essential fixes drops sharply. This is not a negotiating tactic. It is a standard practice in construction contracts and one that buyers in the residential market underuse.
The comparison below shows how leverage shifts at different stages:
| Stage | Buyer leverage | Developer motivation |
|---|---|---|
| Pre-completion inspection | Very high | Completion pressure, final payment pending |
| First 2 weeks post-handover | High | Warranty obligations, reputation risk |
| 3 to 6 months post-handover | Moderate | Warranty still active, but less urgent |
| After 2-year warranty expires | Low | No contractual obligation for workmanship defects |
Organise your snag list by trade to speed up repair scheduling. Group all plastering defects together, all joinery issues together, and all electrical items together. This allows the developer’s contracts manager to assign trades efficiently rather than sending a plasterer back three times for items scattered across the report.
Schedule a follow-up inspection after repairs are completed and produce an updated snag list for any items not fully resolved or newly identified. Do not sign off on repairs until you have physically verified each item. Sending your snag list promptly is correlated with quicker developer action and responsibility acceptance, so the same principle applies to follow-up reports.
Pro Tip: Set a calendar reminder for 22 months after legal completion. This gives you 8 weeks before the 2-year warranty expires to submit any outstanding or newly identified defects in writing.
A snagging report for a new build is most effective when submitted before legal completion, structured with unique item numbers and photographic evidence, and backed by written communication that references your warranty rights.
| Point | Details |
|---|---|
| Timing is everything | Submit your snagging report before legal completion to maximise developer responsiveness. |
| Structure drives results | Use unique item numbers, severity ratings, and paired photographs for every defect. |
| Written records are non-negotiable | All correspondence must be by email; follow up verbal agreements with a written summary. |
| Financial leverage matters | Withhold final payment or a retention percentage until all snag items are formally resolved. |
| Know your warranty window | The 2-year builder warranty is your primary legal tool; submit defects well before it expires. |
Most buyers approach snagging as a formality rather than a process. They walk through the property with the site manager, nod at explanations, and accept a verbal assurance that “a few things will be sorted.” Six months later, they are chasing the same defects with no written record and a developer who has moved on to the next development.
The buyers who get results treat the snagging inspection like a professional audit. They arrive with a checklist, a torch, and a camera. They document everything before they say a word to the site manager. They submit a numbered, photographed report within days, not weeks. And they hold payment until the list is agreed.
The timing insight that most guides underplay is this: the developer’s commercial completion target is your greatest ally. A plot that is not legally completed is a liability on the developer’s balance sheet. That pressure disappears the moment you sign. Use it.
I have seen buyers with 40-item snag lists resolved in three weeks because they submitted before completion and withheld a retention. I have also seen buyers with 15-item lists still chasing repairs at 18 months because they moved in, paid in full, and relied on phone calls. The process matters more than the number of defects.
Prioritise ruthlessly. A report that leads with a cracked tile and a scuffed skirting board signals to the developer that you are not a serious threat. Lead with the moisture ingress, the inadequate insulation, and the door that will not lock. Get those fixed first. The cosmetic items follow.
— Surveymerchant

A professionally produced snagging report carries weight that a buyer-generated list often does not. Surveymerchant connects you with qualified building surveyors who specialise in post-construction inspections for new build properties across the UK. A surveyor’s report documents defects with technical precision, references relevant standards, and is far harder for a developer to dismiss. Whether you need a full new build snagging inspection or a specific defect report for a particular concern, Surveymerchant’s panel of RICS-qualified surveyors provides the independent evidence you need to hold your developer to account. Explore Surveymerchant’s full range of building surveying services to find the right inspection for your property.
A snagging report is a structured, itemised document that records all defects, incomplete work, and substandard finishes in a newly constructed property. It is used to formally notify the developer of issues that must be repaired under the builder’s warranty.
The best time is before legal completion, when the developer still has financial motivation to resolve issues quickly. If pre-completion access is refused, inspect within the first two weeks of ownership and submit findings immediately in writing.
You can produce your own snagging list checklist, but a professionally prepared report by a qualified surveyor carries greater authority with developers and is harder to dispute. For significant defects or unresponsive developers, a professional report is worth the investment.
If the developer fails to respond or refuses to carry out repairs, escalate formally to the NHBC, the New Homes Ombudsman Service, or the relevant warranty provider. Always reference your warranty scheme by name and provide your full written correspondence as evidence.
There is no fixed statutory deadline, but requesting a repair schedule within 14 days of submitting your report is standard practice. The 2-year builder warranty covers workmanship defects, and the 10-year structural warranty covers major structural failures.
Survey Merchant provides vetted RICS surveyors across 100+ UK locations at fixed fees:
→ Level 2 Home Survey (HomeBuyer Report)
→ Level 3 Building Survey (full structural survey)
→ RICS Red Book property valuations
→ Party wall surveyors — notices, awards & schedules of condition
→ Expert witness surveyors — CPR Part 35 reports for property disputes